White Linen Sorbetto

Can we talk about the The Sound of Music? Honestly, what’s there not to love?! And, we all know the scene: that one where Maria kills it with the curtain clothes!! Do, re, mi? I think so!!


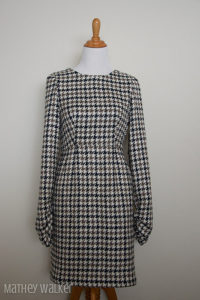
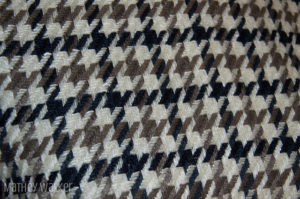
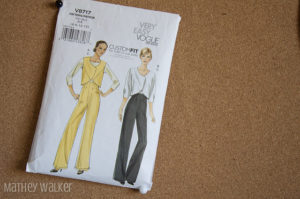
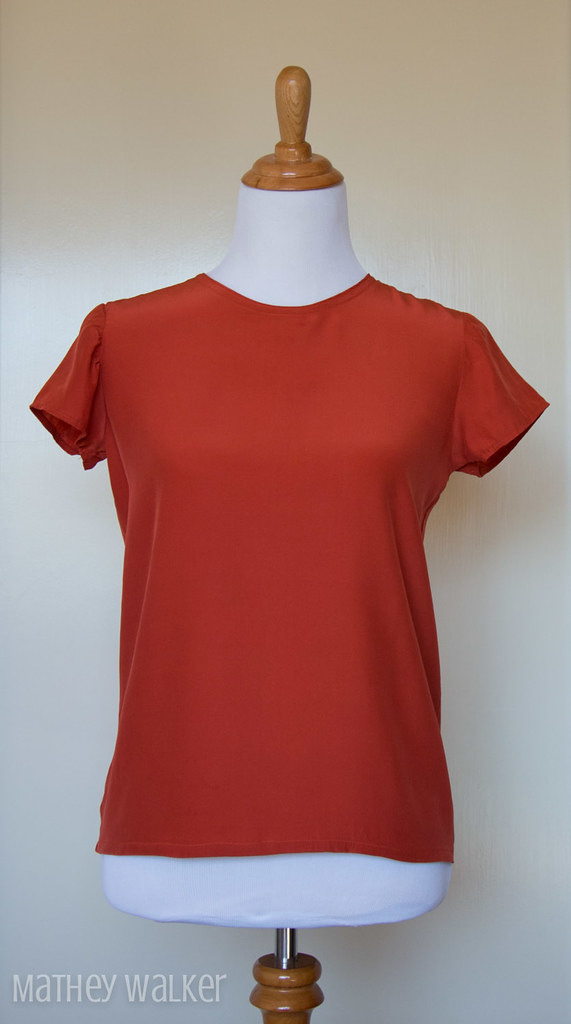
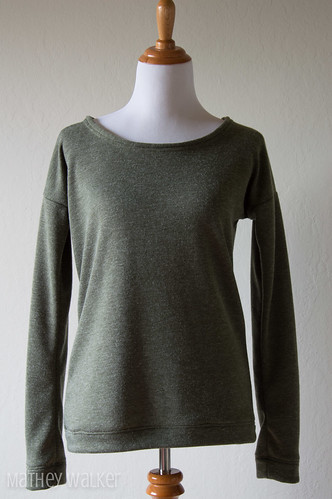
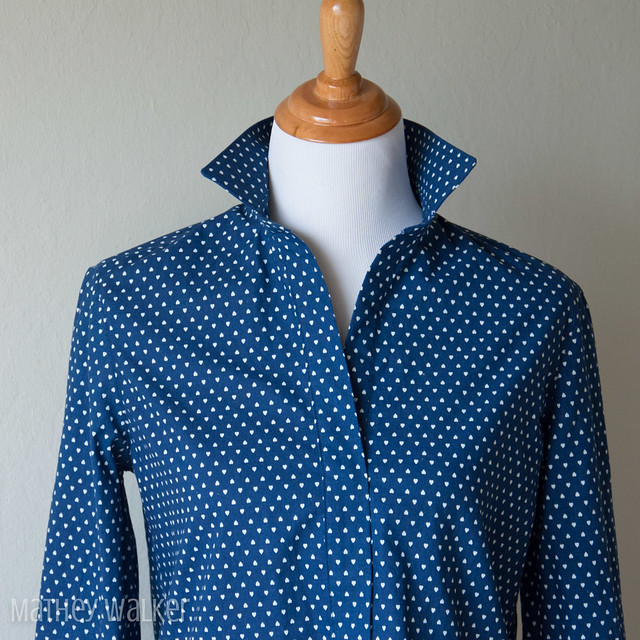
I downloaded the Colette Sorbetto top pattern in 2011 but only dusted it off for a first go-round a short while ago. The muslin was a little snug around the armhole, so I incorporated that change and a few noted others into the version below MADE FROM MY USED TO BE WHITE LINEN CURTAINS #mariawouldbeproud. Behold…


Colette_Sorbetto-37.jpg Colette_Sorbetto-38.jpg


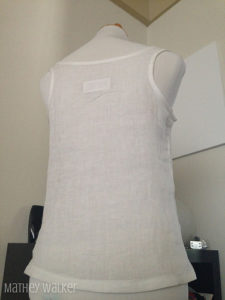
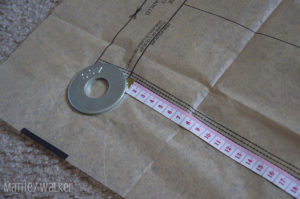
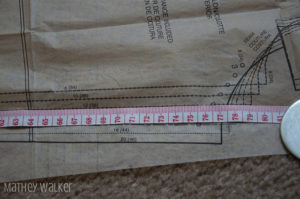
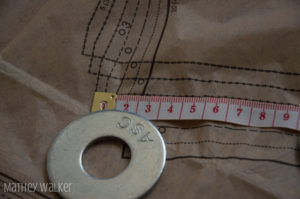
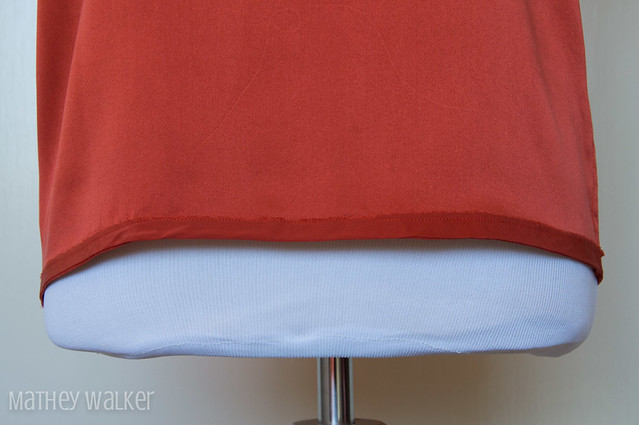
Based on my measurements, I cut the size 2 and graded out to the 4 to accommodate my, shall we say, rather generous hip area region. As far as the other changes go, first, I removed the center pleat, and at the arm armholes, I removed 1/2″ but otherwise preserved the shape in the front. I also lengthened the pattern by 2″ at the waist, so now with the additional sway, it can work tucked in or as an over blouse.
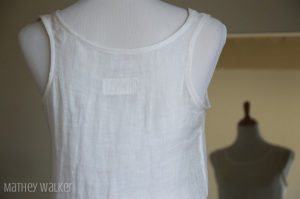
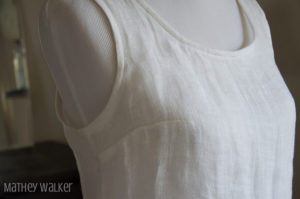
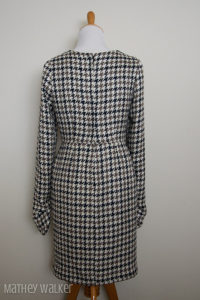
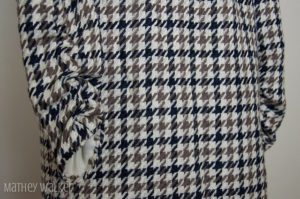
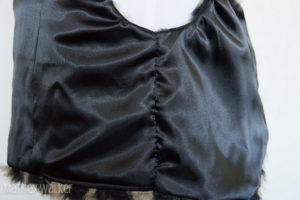
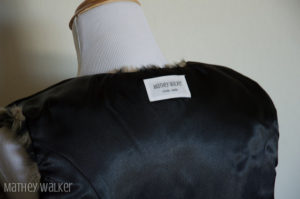
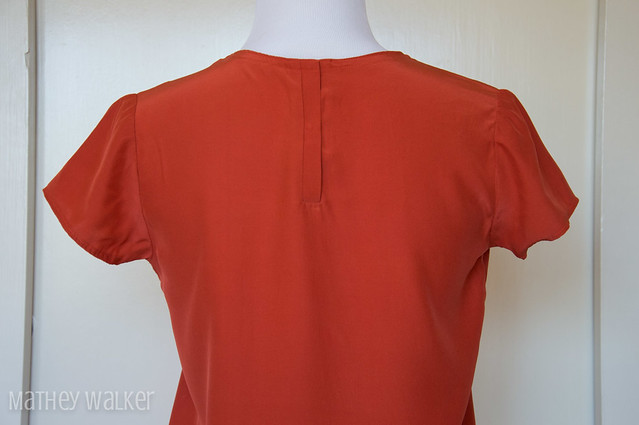
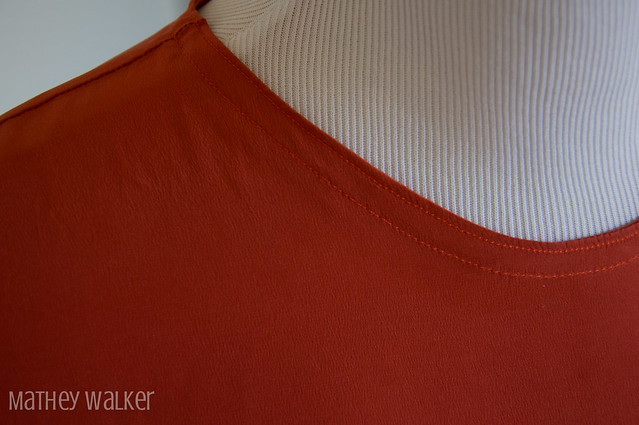
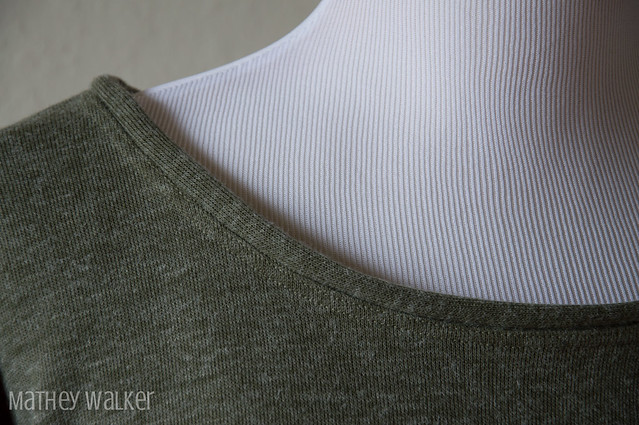
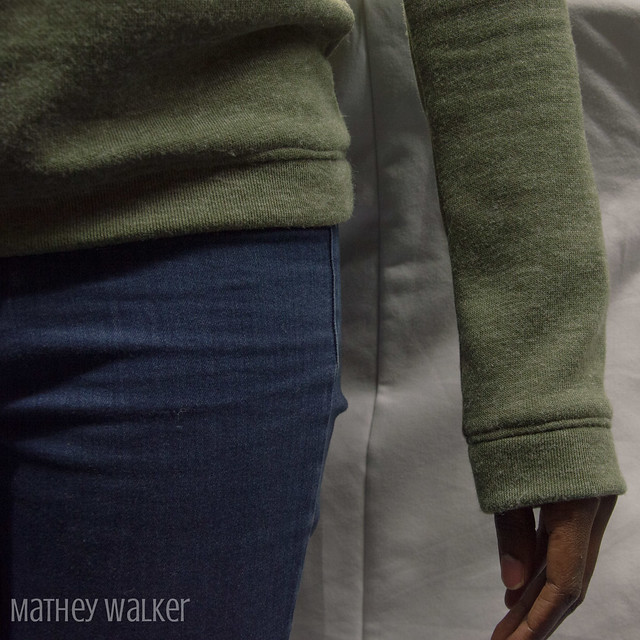
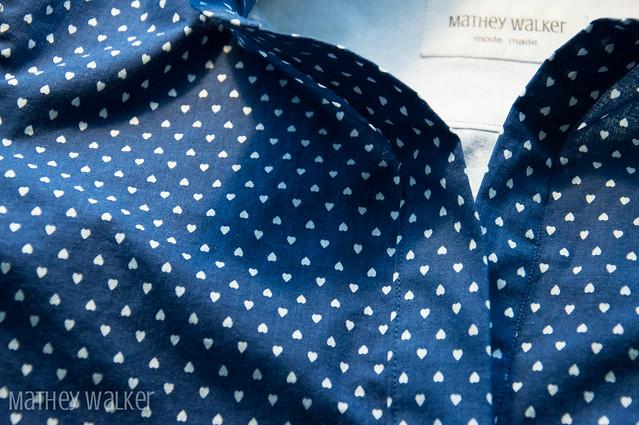
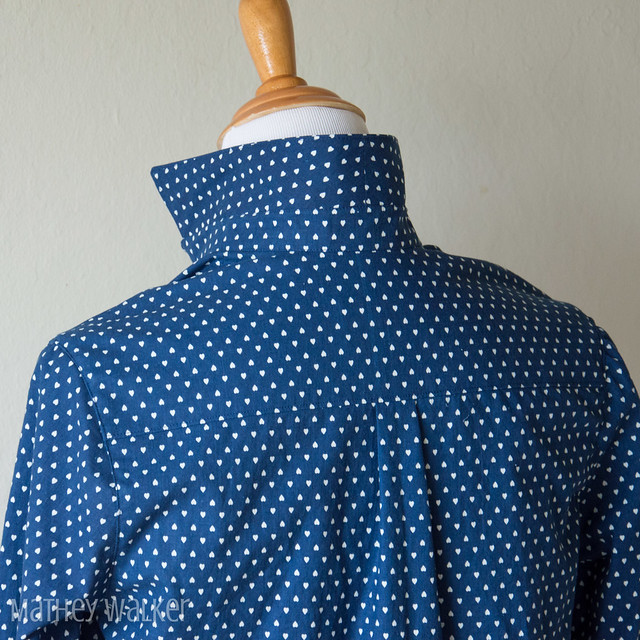
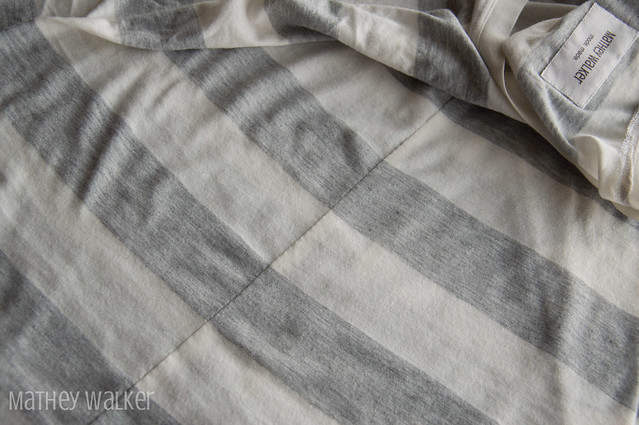
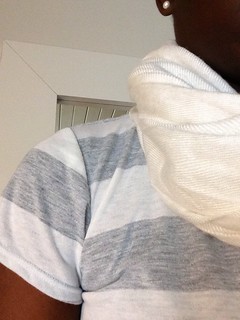
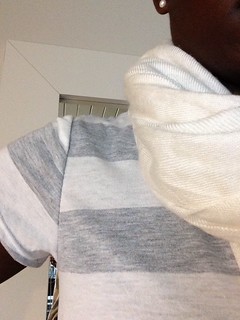
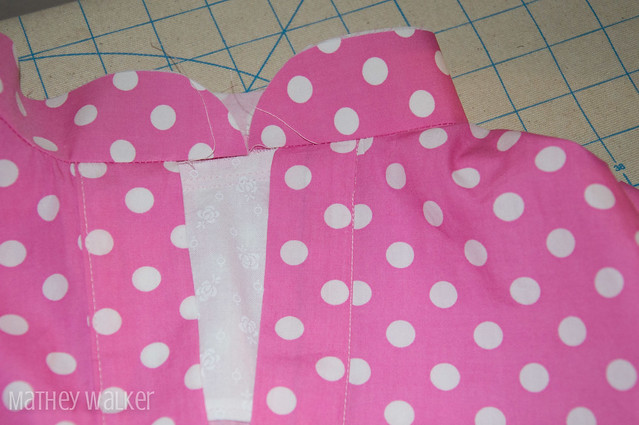
The change about which I am the most excited, though, is the curving in of the armhole that I did on the back of this top. Close-up below. One wouldn’t go so far as to call it a racerback, but to my tastes, there is something a little more… j’sais pas, “sporty+chic” perhaps, about the back this way. I loooooove it! I will most certainly revisit this pattern alteration!

Colette_Sorbetto-34.jpg

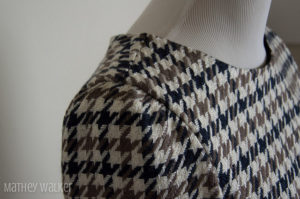
(And, I know. I know. The wrinkles. I pressed AND steamed the stubborn little thing, but after even only the slightest movement, no less than 61984685167 wrinkles would appear. #thatslinen)

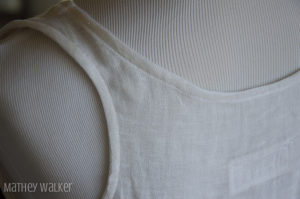
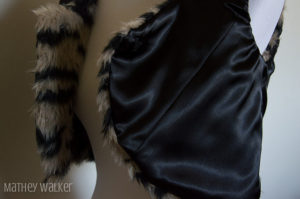
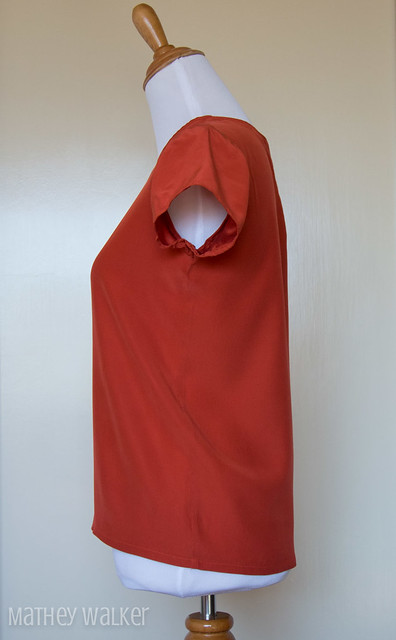
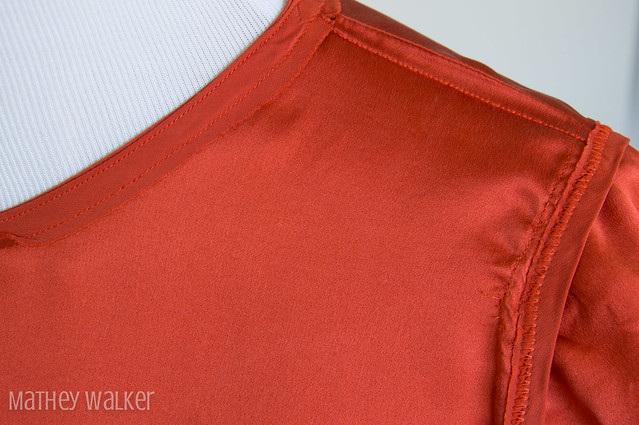
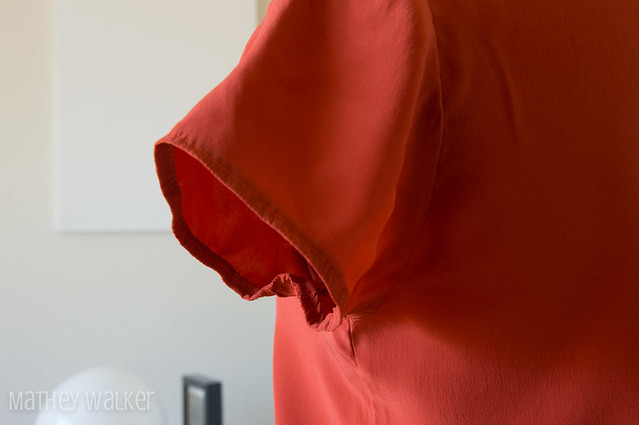
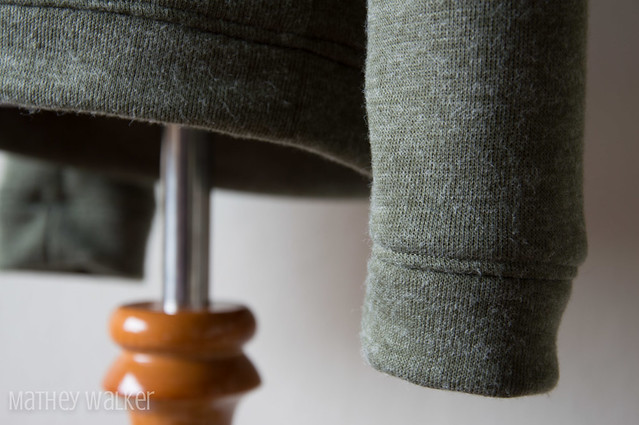
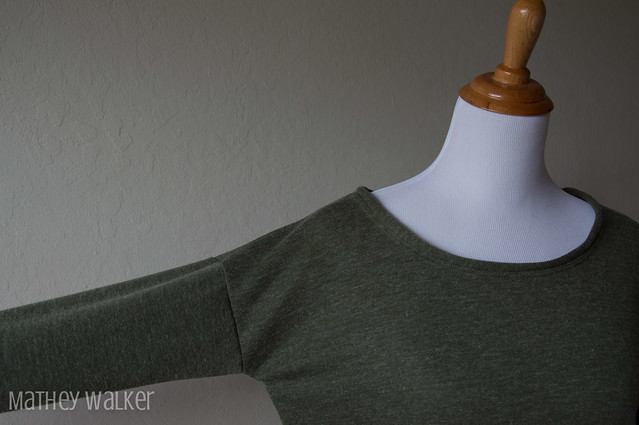
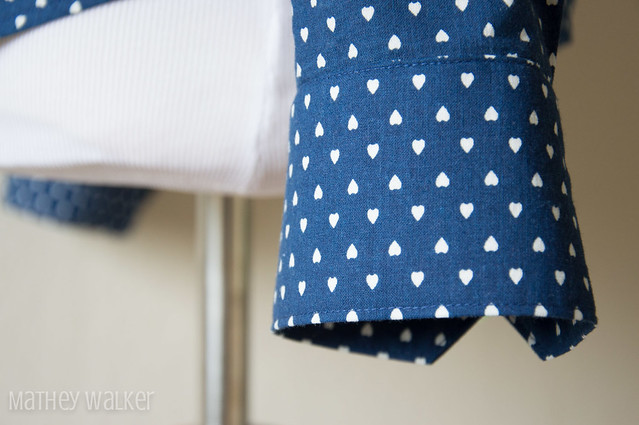
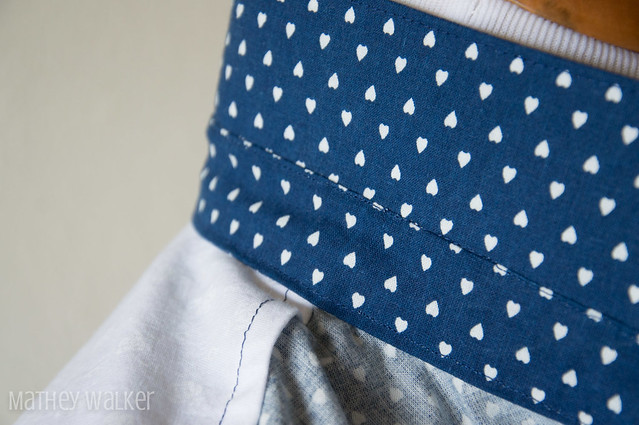
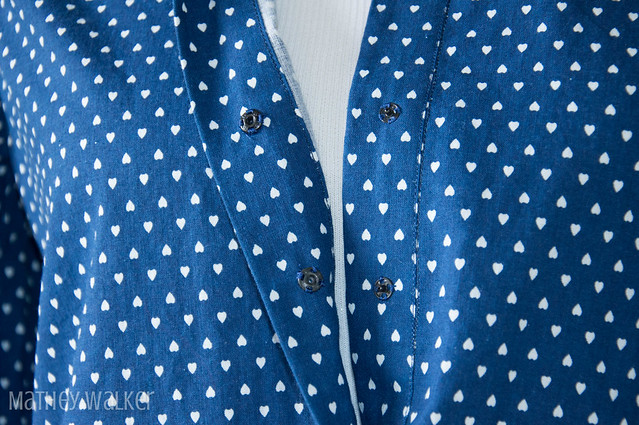
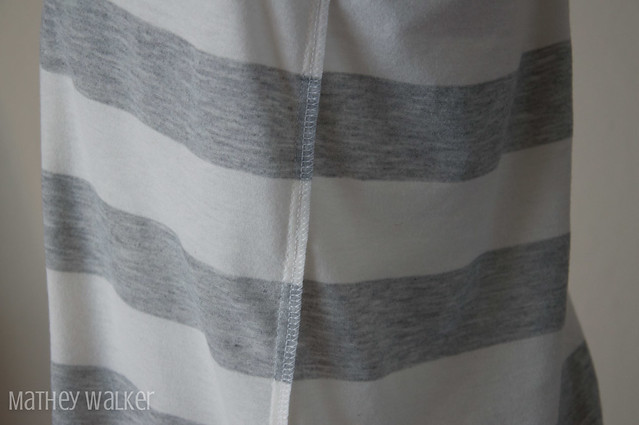
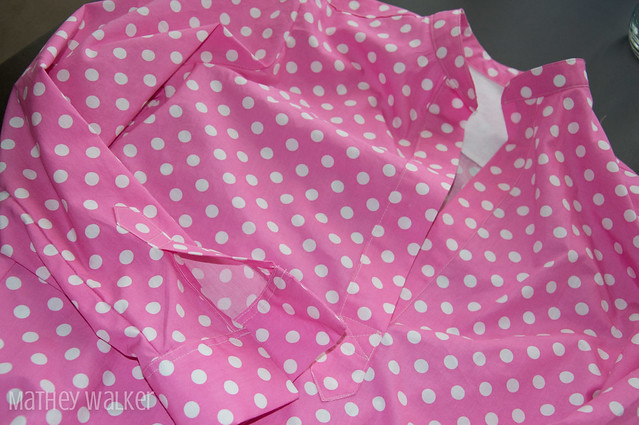
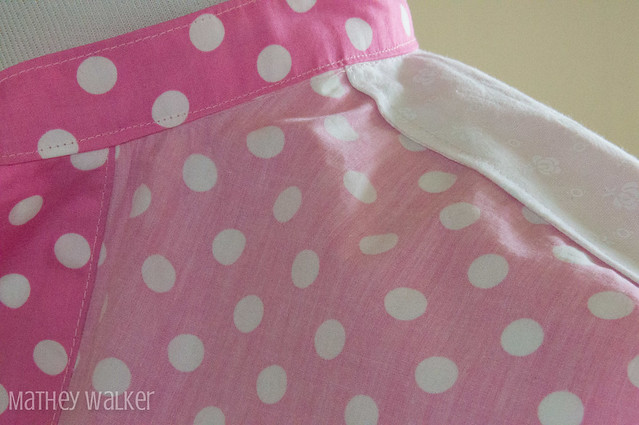
To the finishing, I did a bias binding as the pattern suggests. Were I to do it this way again, I do need to be more mindful of appropriately shortening the bias tape so my edges will lie flat. Look at the armhole to really see what I mean. Mind you, it totally works as is! But, an adjustment of the bias application would make it that much closer to perfect.

Colette_Sorbetto-29.jpg
 

Colette_Sorbetto-33.jpg
 

Colette_Sorbetto-31.jpg

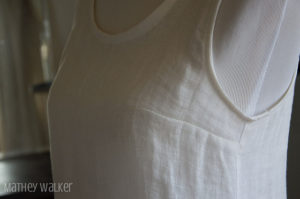
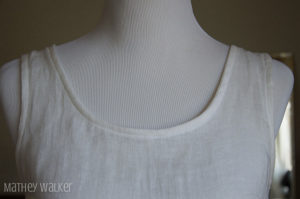
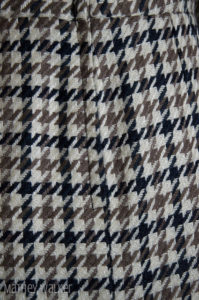
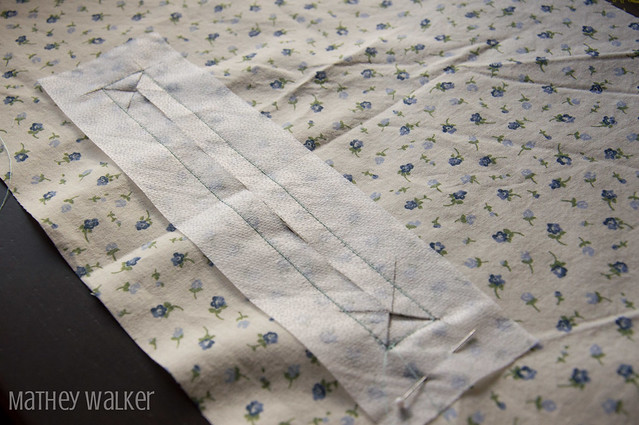
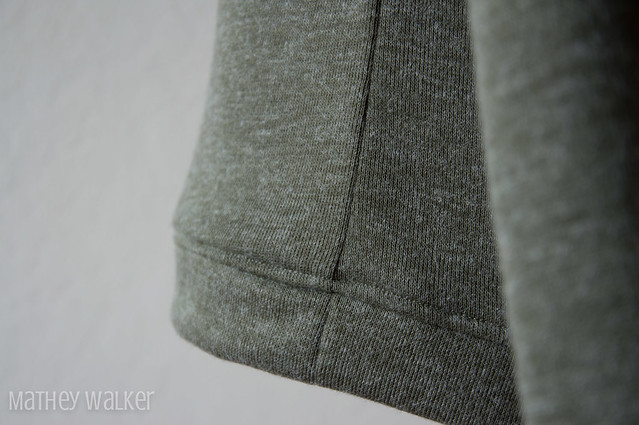
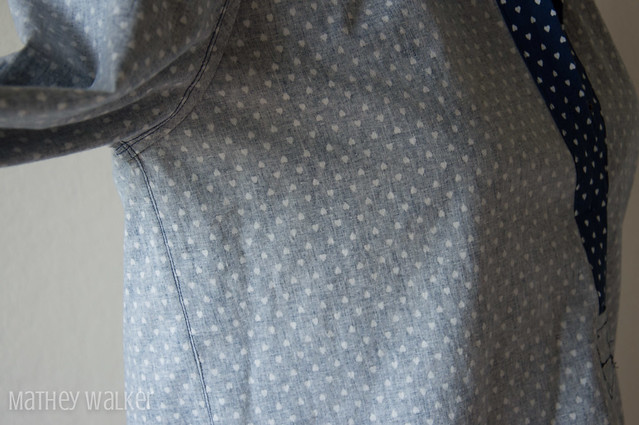
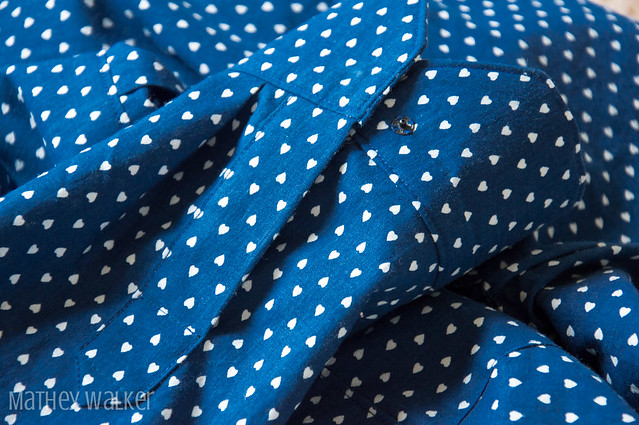
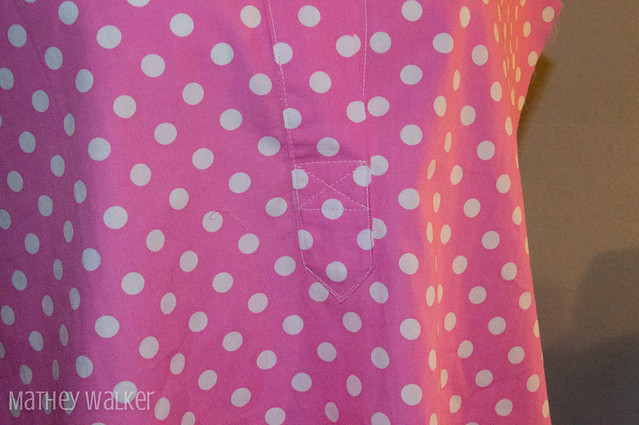
The last point that I’ll make about this particular iteration of the Sorbetto is a question to all of you about marking fabric. If you look really closely at the picture below, you can see a hint of the yellow chalk I used to mark the dart legs (and appreciate how unstable of a weave this linen is!). As I think about it now, I guess I could have just used the tracing wheel without chalk paper to make an indentation in the fabric that I could then sew along, but who knows. Tips or suggestions would be most welcomed!

Colette_Sorbetto-32.jpg

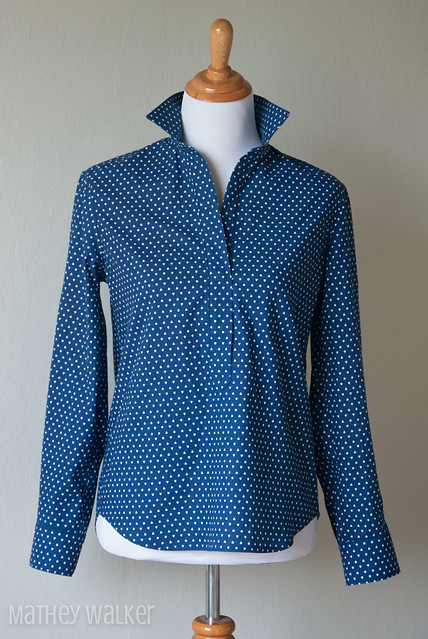
Spotted: Styled and ready to go, Sorbetto goes glam! Final verdict? Definitely two scoops!

Colette_Sorbetto-18.jpg

~ * ~ * ~ * ~ * ~ * ~ * ~ * ~ * ~ * ~ * ~ * ~ * ~ * ~ * ~

P.S. To come full circle, can we just have a quick group moment together where we all just swoon over Maria and the Captain? #edelweiss


Mmmm, that was good.

Blue / Tan / White Concerto

When I think about summer, the first thing that comes to mind is wedding season, and this past month two (/four!) very dear friends got married. My present for the first couple is the subject of today’s post: a blue, tan, and white quilt using the Concerto pattern from Aria Lane.

Concerto-28.jpg

In picking the color scheme, I just used the colors from the couple’s wedding invitation! That made the choice rather easy. I used an assortment of Kona and Legacy quilting solids, and here is a shot from Instagram of the quilt top all sewn together.

From Instagram

This was my first quilt, and I picked it because, while there are many pieces, you are primarily just sewing squares and triangles with straight lines. Not too bad! As far as the actual quilting, the pattern suggests a set of free motion quilting lines, but here is a close up of what I did instead, just simple squares across the intersection of quilt pieces. I wish I had a photo of myself sitting at my sewing table with this petite bête rolled up and perched over my shoulder as I quilted the top and bottom together… oh-em-gee.

A few weeks ago I was soooooo excited about my new bias tape makers, but then a friend of mine told me about her way for binding a quilt that was really straightforward. Basically, you take your bias tape folded in half and align the raw edge with your quilt and sew with a 1/4″ seam allowance. After that just flip the folded edge to the back and hand-sew it down. Easy peasy! I used this tutorial from Bijou Lovely to actually make my straight-of-grain bias tape out of some leftover Kona snow.

Concerto-1.jpg
 

Concerto-5.jpg

Even though it’s fairly modern, I still wanted the quilt to be snuggly and delicious, so as far as the back goes, the reverse is a blue and white striped 100% cotton flannel. One of the things I really liked about how I quilted it was that the back has a simple diamond print that isn’t actually – but for me conjures up feelings of – a cute argyle.

Concerto-17.jpg

And finally, the cherry on top to seal the deal? I free-hand embroidered a little label with their initials and wedding date. I hope that this will be something that they cherish for years to come *swoon*. Congratulations guys!!

Concerto-41.jpg

Um… what?

EDITED TO ADD: OK, OK, crisis averted!! After consulting Tasha and this Threads article, it’s tooootally fine that you have different inseam lengths. You just stretch the back to meet the front. Who. KNEW?!?! 
Simplicity’s customer service still sucks though. #shade

After banging my head against the wall for the last couple of weeks, I turn to you my sewing blog world friends to confess my latest epic failure endeavor. But, for the record IT WASN’T MY FAULT!! (I think?!)

Ok, so. You guys know from Instagram that I was just SO pumped to get going on these Burda pants. I have a lovely Theory wool that I picked up from Mood a few weeks ago with the intention of making a pair of professional pants. Let’s just say that’s not happening with this pattern.
Being that this was my first time sewing a Burda Style envelope pattern, I actually set out to make a muslin. Yes, I consulted the size chart. Yes, I used the right set of measurements. Yes, I cut out the right size. HOWEVER. Once I made the muslin it was SHAMEFULLY ill-fitting. I couldn’t possibly post a picture. But trust me when I say the back is horrrrrible
When I was sewing the front to the back I noticed that the seam allowances did not align, but again, I KNEW that I cut out the right size. So I broke out the tape measure and went back to the original tissue pattern. Based on my measurements, I am a size 12. Look at this craziness going on with the inseam pattern measurements (I remind you that on the envelope patterns all seam allowances etc are included)…
FRONT (79.5cm)

BurdaError-14.jpg

BurdaError-5.jpg

BACK (77.5cm)

BurdaError-21.jpg

BurdaError-25.jpg

THE INSEAM LENGTHS ARE OFF BY 2CM…. UM…. WHAT??!?!?!?!?! Burdaaaaaa, you let me down. You let me down. Smh.
The thing is, I’m not the first person to make these pants: Lori made them and so did Tasha. I need to do some investigative recon with these two to figure out what on earth went wrong. AND I’m going to circle back to Burda (/Simplicity?) to figure out if there was some kind of grading/printing error. I lost count of the number of times that I put the traced-off pattern pieces on top of the tissue to make sure I had the right size for the pant front and back pieces.
What a disappointment. I’m kind of a little bit scarred? This is my first mishap of this type with a major pattern company. Truth be told I’d probably be more relieved if it turned out to be my fault! I think I’m going to leave the Burda envelope patterns on the shelf for a little while… 

Did someone say “Doctor”?!

June marks 6 months that I have been blogging here at Mathey Walker. So much life has happened during that time! The latest update?! I just got my PhD!! Woohoo! If you were looking for a doctor, then friends, you have come to the right place. I’ll spare you the technical details of my research, but I will share all the juicy tidbits about the dress.


2014_06_30-Doctor-7.jpg 2014_06_30-Doctor-6.jpg


If you follow Mathey Walker on Twitter or Instagram, then you knew I was under the gun trying to finish this dress in time! My defense was at 1pm, and I finished whip-stitching the lining to my lapped zipper, oh, circa 10:45am. Seriously.

Not much to say besides this pattern (McCall’s 5927) is lovely, and I will absolutely revisit it as I now work on expanding my professional wardrobe. I imagine it would be divinely fabulous in a delicious black-on-black fabric with an interesting weave. Mmmm.

On this dress, lots to love, but I will say that my favorite little detail is the way the hounds-tooth pattern comes together in a little chevron at the shoulder seams. #patternmatching

2014_06_30-Doctor-1.jpg

More on the fabric, this too is in fact a wool tweed here that I picked up on one of the 7th Ave. fabric stores. Which one? Who knows, it was eons ago, but I bought it with this pattern in mind. But let’s zoom in a little… do you see that weave?!?! Zomgg.

2014_06_30-Doctor-4.jpg

The photo truly doesn’t do the beauty of this weave justice. It is absolutely brilliant. Beyond the wool, the dress is lined with a charmeuse-y silk cotton blend that is a gentle caress of heaven against the skin.
As far as adjustments go, I cut a straight size 12 based on my measurements but shortened the bodice by 1in and sewed the skirt closed at the hem disregarding the shady unique suggestion the instructions presented for inserting a hemline vent. I knew from the muslin that the skirt was not too narrow to prevent walking so it’s truly fine for those of you who may be thinking about doing the same.

2014_06_30-Doctor-5.jpg

I LOVE the sleeve ruching. I learned a new technique putting that in. Hopefully you can appreciate it from the photo.
I mentioned the lapped zipped. At the end I was sweating bullets looking at some of the online tutorials about the insertion instructions. Gibberish. AT BEST! I was so so so happy to have this book on hand for a a clear set of instructions! Obviously Reader’s Digest wins.

2014_06_30-Doctor-3.jpg

Here you’ll see just the bottom of the lapped zipper. I love how clean and classic this looks. This may be my new go-to zipper insertion style… Idk, it’s pretty fly!

2014_06_30-Doctor-2.jpg

One last shot, the only kind of one of me wearing it during my talk.

2014_06_30-Doctor-8.jpg

And that’s all folks!

Love,
Dr. Me

Fiesta Meow

Friends, sometimes there is just something in your soul that just needs to come out. It’s like pressure-cooker-off-the-charts exploding. In situations such as these, one has but a single choice: give way and let it go. That’s how I ended up creating this little gem.

2014_06_14-FiestaMeow-2.jpg

It’s slinky, it’s furry, and it’s absolutely fabulous. I am at the same time completely ashamed and unapologetically enamored of this treasure. Truth be told, I started it a little while before moving to Paris, but now that my sewing space is back in full swing, I wanted to tackle some of my unfinished projects.

The details:

1) I used a demure little pattern, View A…

2014_06_14-FiestaMeow-15.jpg

but gave it the fiercest fiesta meow treatment that I could muster. It had to be tiger. It had to be (faux) fur. It just had to. As a side note, I have made the pants included in the pattern as well. I used a black linen. Dream. Highly recommended. But, back to the project at hand.

2) This was my first time having to do any significant hand sewing, and you know what, the fell stitch isn’t so bad! In anticipation of an upcoming project that will have A TON of handsewing involved, this was a good dry run. The lining was a little too slippery to work with comfortably (ugh, polyester charmeuse), so there are some little ripples here and there, but it truly works. I know what I need to do next time for a neater installation, but I’m pleased with this outcome. Quite, in fact!

2014_06_14-FiestaMeow-9.jpg

2014_06_14-FiestaMeow-11.jpg

3) Wondering how about the closure? Well, it’s a bit of a Where’s Waldo game, but in lieu of the recommended snaps, I used a black hook-and-eye mechanism intended for pants. I like the uninterrupted front, and one truly is enough. The vest even looks good unhinged, so that gives me another wearing option as well.

2014_06_14-FiestaMeow-7.jpg

4) You guys know that I love my labels, so I had to include a shot for good measure

2014_06_14-FiestaMeow-10.jpg

I think this will be most at home in the New York slice of my wardrobe, but I am as happy as can be!

2014_06_14-FiestaMeow-12.jpg

Purrrrrrrrr.
  

Hip! Hip!

It should be said for the record that first and foremost in this world, I am a Tiger (see point #29). Now, with Reunions (see point #30) just around the corner, of course that means my little sewing studio is *covered* in orange and black (see point #2).
Newest addition to my Reunions wardrobe? Behold my new Scout in a gorgeous burnt orange silk charmeuse…
2014_05_25-SilkScout-4.jpg

You guys remember that the first time I made the Scout it was a knit, and I had some difficulties with the fit. Well I am happy to report that lowering the armscye and the shoulder seam by 1/2″ completely got rid of those drag lines.

Since this one is in a woven as opposed to a knit, though, I am now really aware of the snugness at the arm. I need to do a little bit of adjustment on the armholes and sleeves but once that’s done, this will actually be the perfect pattern for a basic tee.

So, here are the details on the adjustments:

1) I raised the back neckline by 1/2″ and in the front I raised the neckline by 1+1/2″ at the center and 1/2″ at the shoulder seam. I redrew that curve and absolutely love the high neckline.

2) I narrowed the pattern overall by measuring in 1″ in at the hemline and redrawing a new side seam to the armscye. I love the more svelte shape of the shirt this way! (Granted, baby got back, so I could use a scant 1/4″ more in circumference just to make it that much roomier, but, eh, this totalllly works.) Also, I cut the pattern so there would be a bit of a high-low thing. I like it.

2014_05_25-SilkScout-5.jpg

3) The placket!!! Since I narrowed the neck opening this is definitely no longer an over-the-head shirt. I wanted the front to be just flat, so that meant opening the back. I used Megan Neilsen’s simple placket tutorial, and used two pieces that were 1″ once they were folded. I sewed a 3/8″ seam for the placket insertion, so the two flaps are 5/8″ wide in the final application! Swooon, I love it!

2014_05_25-SilkScout-9.jpg
 

2014_05_25-SilkScout-12.jpg
 

2014_05_25-SilkScout-14.jpg

In terms of the construction

1) Side seams and shoulder seams are all French and I bias-bound the armhole seams.

2014_05_25-SilkScout-18.jpg

2) For the neckline and hem, I used a strip of bias which I just sewed under. I’m not sure how I feel about the double neckline stitching. Maybe it makes it too casual? I like it. Love it? Maybe not yet, but in time, who knows!

2014_05_25-SilkScout-10.jpg
 

2014_05_25-SilkScout-20.jpg

3) For the sleeve hem, I just double folded 1/4″ and sewed that down.

2014_05_25-SilkScout-11.jpg

Anyway, this little number is packed up and ready for action! So, so excited!

GO TIGERS!
  

Pochette

Friends, I have been dreaming about quilting. Like, actual dreams about actual quilting. It’s been wonderful. So with just a few ingredients…

DSC_0003.jpg

here’s what came to fruition…

DSC_0113.jpg

A quilted vinyl cluth!!!!

I am so, so, so in love with this bag! It’s the perfect size, a great weight, and was a productive way to burn through some of the fusible fleece batting I’ve had in my stash – literally, for years.
I had originally thought I was going to do a chevron pattern like I have traced out below, but honestly it was a little too 70s-peace-and-love for my tastes.

DSC_0019.jpg

So instead, I drew on some more quilting lines and went to town pulling all of those little threads through! In the end it was so totally worth it though!! I really love the classic, well, class of the small quilted diamonds on the finished product.

DSC_0028.jpg

This clutch is, again, just actually the perfect size! It’s become my new favorite carry-along as it perfectly fits my journal, phone, keys and (naked! gasp!) iPad. Just, all the love.

IMG_4343.jpg

For a sneak peak inside, there is a handy pocket for keeping my phone from floating around too much. I did a kind of shoot-from-the-hip, faux-welt thing, and there are a couple shots from along the way for those of you may be interested in the construction details.

IMG_4344.jpg
 

IMG_4348.jpg

My favorite thing for sewing a window opening into fabric? Using fusible interfacing! It gives you just that much more body to hold on to when you sew the box to be turned, and once you’ve cut and turned, you can fuse those little ends down to make sure everything stays firmly tucked in place! This is a trick I use especially on things that would go through the wash.

DSC_0105.jpg

Once all is said and done the right and wrong sides look as pictured below. I just realized that I didn’t snap any shots from the pocket insertion steps, but next time I make one of these, I’ll take a few to pictures of that part of the process. The “fauxness” of the welt and the doesn’t-need-to-be-edge-finished-ness of the vinyl made it super easy to do!

DSC_0112.jpg
 

DSC_0111.jpg

Hmmm, so OK – I think that’s it!? Even with the quilting, this was a quick and easy project! There’s a whole heckovabunch of vinyl on my cutting table right now, so there will more of these down the line.
    

A springtime sweater: Grainline Hemlock

Friends, salut. It’s springtime in California, and to celebrate the occasion, I sewed myself a sweater… Trust me, that logic makes total sense. That line they sell you about California being the golden state of never-ending sunshine? Yeah, that’s not really a thing.

Behold….


2014-04-26_Hemlock-23.jpg 2014-04-26_Hemlock-24.jpg


This weekend I sat down for a couple of hours and this, my take on the Grainline (free!!) Hemlock pattern, came to be.
I made a whole heck of a lot of alterations, which I’ll outline in detail below, but the top-level view is that this would get a rating of “Like+” on my subjective sliding scale of satisfaction. I knew going in that this had a rather generous neckline, and my first thought when I put it on was “oh, uh uh” because I’m definitely not an off-the-shoulder kind of girl. But then I wore it around my apartment, then out to meet a friend, and I finally realized that when it is actually in place and appropriately adjusted on my actual body, this sweater-knit top totally works!
Were I to make this again, I would absolutely reduce the neck opening, but I will be returning to this top as an easy I’m-kind-of-wearing-a-sweatshirt-but-can-shamelessly-still-go-out-in-public top.
On construction
I pretty much stayed true to Jen’s instructions. For the neckline, I made an eeeeeeedy-bitty rolled neck band and twin-needle stitched that in place. I kind of really like the way the directionality of the stitches in the neckband are in a different orientation relative to those in the main body of the garment. A microscopic detail, but a detail nonetheless!

2014-04-26_Hemlock-6.jpg

Additions and Alterations

1) I removed 2″ from the side seam at the hemline of both front and back pattern pieces and then redrew a more curved side seam. This yielded a more slim-fitting (though still generously comfy) top. Of course there is no full-body shot of me wearing it, so take my word for it!

2) I added a 1.75″ band to the sleeves and hemline and, to me, it’s these elements that give this a “dressy sweatshirt” vibe. I topstitched the bands mostly for the sake of aesthetics, but this does keep the seam allowances neatly oriented inside.

2014-04-26_Hemlock-2.jpg
 

2014-04-26_Hemlock-10.jpg

3) I lengthen the sleeve by a whopping 3.5 inches *in addition* to the extra 1.75″ from the band. I love to pull my sleeves down over my hands, and without even trying, the sleeves on this guy cover my palm. I’m really happy about that!

2014_04_27-Hemlock-29.jpg

I think that’s everything for this sewing story. Again, we’re going with “Like+”… but I’m sold!

2014-04-26_Hemlock-12.jpg
Grainline loooooove!!!


Bamboo

Friends, these past couple of weeks have been fraught with challenges, one of which being how best to share my latest creation, McCall’s 6083. So far, Theta has been a lovely model, but as she does not have legs, it was highly comical trying to get this jumpsuit to “work” on her. Thus, I give you…. myself.

My thoughts on…

The fabric
1) Bamboo jersey, is a. dream.  I loved this fabric SO MUCH. It is very much like just being draped in luxury. I may or may not have completely enshrouded myself in the leftover fabric as I was sewing this together, just for the sake of being fabulous. At home. In my sewing room. By myself. #noshame

2) While bamboo is a dream, I found it ever so slightly difficult to work with. That may have been because I didn’t properly balance out tensions and pressures on my machines. I am liking this world of knits though, so I’ll definitely try again!

3) I would also say that this is a very impressionable fabric, c’est-à-dire not the most structured, and, duh, as a drapy knit, I kind of knew that going in, but the plasticity was still surprising at times. I had to be mindful of pressing, and when I wear it, you can see, my hands are outlined.

The pattern
1) It went together easy enough, but I must say that I absolutely hated the facing nonsense they have you do in the pattern instructions. When I make this next I will definitely fully line the bodice.

2) Next time also will mean no pockets. I thought they would be super great and functional, but I think there is an elegance to be gained by leaving them off.

Fit alterations
You know how you should always make a muslin, and then you don’t, and they you realize that you should, but then you’ve already started, so why stop now, but then you finish and realize that, no no you actually should have made that muslin first? Well that kiiiiind of happened this time. Ooops, teehee.

You’ll see in the one photo to get this week that this is a fully wearable garment. (I sewed in a tag so it’s done!) But… There are a few things that I will do differently next time

1) I need to shorten the bodice by about 2 inches so the seam falls at my natural waist

2) I cut a straight size 8, but I also think I could take the bodice down to a 6 for it to fit more snuggly through the bust. Yes, yes – this time was with a knit, so I need a woven muslin to test drive these changes should I go for a silk/cotton/linen version in the future, but everything is mostly there.

Fun fact: I also made the obi-inspired belt. If you don’t have a copy of this book, I’d encourage you try it out! Lots of quick, easy projects (i.e. presents!).  


Polka hearts

Friends, hot off of the press(ing table), I give you the newest addition to my wardrobe.

PolkaHearts-1.jpg

Now, I will be the first to acknowledge the outpouring of Grainline love happening in these the early days of Mathey Walker. But (!!) how can I not?! I’ve been so indescribably pleased with all of the things I’ve whipped up from the Grainline arsenal.
Though I’ve advertised this as my “over-the-head Henley-type Archer”, upon further research, I realize that with the collar in place, I cannot in fact call this Archer a Henley. That makes me a little sad because I find the lilt of the word “Henley” to be oh so jolly and fun. Everything should be called “Henley”! As usual, I digress.
To the Archer!

PolkaHearts-2.jpg

On Construction
What can I tell you?! Between the POLKA HEARTS and the lovely way it fits, this Archer is truly nothing but charm.

PolkaHearts-3.jpg

The fabric should ring a few bells – this was one I picked up in Italy during the winter holidays. It is a glorious piece of cotton, so sewing with this fabric was a stroll down Easy St. A detail: all of my finishes are French seams, and my topstitching is still the pits. Small victories though – look at this cuff!

PolkaHearts-4.jpg

PolkaHearts-5.jpg

PolkaHearts-6.jpg

I went with a contrast yoke facing, and if you look really closely you can see the white-on-white flowers. Again, a note about charm.

PolkaHearts-7.jpg

In lieu of buttons, I installed snaps on both the neckline and sleeve plackets. I thought that with such a busy fabric, buttons could make for an eyesore, but after wearing this around for a day, I realize that a more secure closure is very much in order (at least on the center front). Here commences the search for a discrete blue button.

PolkaHearts-11.jpg

PolkaHearts-12.jpg

On Fit
You’ll remember when I made the Scout, I had some fit issues around the shoulder/armscye. The dress rehearsal for this Archer didn’t reveal any glaring fit problems, but I had a minor panic attack that on opening night terrible wrinkles would appear and I would have to be sad. But, alas! No wrinkles! No sadness! No “shirties” this time, but take my word for it. Home. Run.
I’m going to have to forbid myself from making only Archers. The rest of my patterns may start to get a little jealous…

PolkaHearts-13.jpg

PolkaHearts-14.jpg

Want more pictures? Head to my latest set on flickr!


Notes on a Muslin: Grainline Scout

Et alors, cette semaine, un petit détour. I was – and am still – working on my Henley Archer, but this past weekend it was the Scout that kept me busy.

GrayWhiteScout-1.jpg

A funny reflection: I think it took me longer to assemble and trace the pattern than to actually sew the shirt together. Oh print at home patterns… I digress.
Technically this is a muslin, but, I mean, you can see: I sewed a label in, so we’re definitely going to call this one a keeper! A few tweaks are needed before churning these out en masse, but 1) thrilled about the final product and 2) I’ll expand on future adjustments when I talk about fit.
On Construction
Proudest moment?! I matched those side seam stripes like. a. boss. This time, I cut my fabric double-folded and also pinned along each gray strip for the width of the pattern pieces. That kept everything quite tidily aligned.

GrayWhiteScout-2.jpg

Typically, I’m not one for sewing with knits, mostly because of the ease with which the resultant garment can dip into the “looks homemade” category if the finishes are not properly executed. But! Cut to a Saturday afternoon trip to my spot where I picked up this bad boy

GrayWhiteScout-5.jpg

Coverstitch Machine I have not, but Twin Needle is my newest partner in crime. In the opening photo you can see the collar, sleeve, and hem finishes (detailed neckline below). Final verdict?! This looks like a real thing! I’m pumped! No looks-homemadedness on my watch!

GrayWhiteScout-6.jpg

Separately, if any of you have a few tried and true tips for sewing with knits, I’d love to hear them! For this shirt, I set up both my regular sewing machine and my serger and toggled between the two the whole way. My question to you: is it really a thing to sew a seam and *then* serge the edges to finish everything off? Check out this shot of the inside side seam. I don’t mind sewing and then serging, per se – at least not on a quick project like this – but what are the pros and cons?!

GrayWhiteScout-7.jpg

On Fit

I snapped a few iPhone selfies (shirties?) to show you the only thing that didn’t quite work out with the Scout for me.


Untitled


Notice those diagonal wrinkles radiating toward the neckline when my arm is down? Basically I need a deeper armscye and perhaps a slightly more angled shoulder seam – both super easy fixes.
All in all, I am extraordinarily pleased with this project. I wore this shirt during the week, and the combination of a featherweight fabric and a beautifully drafted pattern was truly divine.
Check out my set on flickr for more details etc.


Notes on a Muslin: Grainline Archer

So, I’m not a pink person – not in the least – but this pink polka dot muslin for my Henley Archer is just all. the. things! In my last post I mentioned the plans I had for my take on this lovely shirt pattern, and I stayed pretty true to that as I constructed the mock-up.

ArcherMuslin-1.jpg

Here are my thoughts on the finished muslin:

1) I left off the collar! I was using Andrea’s collar tutorial, and as soon as I got the first part of the collar stand in place, I knew that’s where I needed to stop. The polka dots are so playful, a stand collar alone really does seem to properly fit the bill.

ArcherMuslin-2.jpg

2) The placket was soooo much easier to install than I thought it would have been! I had to triple check my math because since the upper flap and under flap (technical terms?!) are not the same width, I had to shift the entire installation off-center front by 1/8th of an inch to make sure the final placket was located on the true center.
I *like* the placket width as it stands, but I definitely don’t love it. I think that next time I will  reduce both flap portions, upper and under to 1″…

ArcherMuslin-3.jpg

…and hopefully that will help me avoid this problem when I whip this bad boy up in my real fabric. Look at the shadiness that happened around the center front!!! All kinds of misalignment. SHAME! The center back and notches were aligned, but the additional + unbalanced addition of fabric in the front caused a big mess.

ArcherMuslin-5.jpg

Two possible solutions. The first, like I mentioned above, would be to have both flaps be the same length and stick to the widths that would be added (1″) if I were to construct the pattern as designed. The second? Break out the ruler, measure, cut, and tape a new collar stand pattern piece together that would allow me the freedom to make the placket whatever size my plackety little heart might desire! Likely sticking to option one for right now, though.
3) In my now almost 3 years of wardrobe sewing, there has been one constant and unshakeable truth: top stitching is the devil. Just the actual devil. I have an edge-stitch foot, I advance at a careful, g..l..a..c..i..a..l pace, but, like, it’s honestly just always a hot mess. This was my best effort around the base of the collar stand. Wobbly it may be but I will *not* unpick that. Here’s hoping the next will be more delicious. Smh.

ArcherMuslin-10.jpg

So those are all the construction things, but a note on the fit. I cut the straight 4 based on my measurements, but we need to go on ahead and grade out to the 6 to allow for some additional TR (ehem, that’s “tushy room” for the inquiring minds). I went nuts and added 2 inches in length based on that of my darling Ralph Lauren Oxfords, but at the end of the day, in this pattern, those extra two inches take it from a shirt to that weirdly tunic-y length that just won’t do.
Alas, as per usual, a few more photos on flickr, and hopefully a new shirt to share oh so soon!

Bonne fin de la semaine et gros, gros bisous!

What kind of archery is this?

Guys. I am beyond excited about the magic happening on my cutting table right now!!

It is so obviously clear that Jen blew. up. the internet last year. Literally, her Archer pattern was everywhere. So, fresh off the plane from Paris, this is the first project on my to-sew list. But, why not mix it up a little….
Here is the plan I drew up somewhere over Nova Scotia. (Apparently Moleskine paper doesn’t like to be erased…)

The Archer is genius, and I plan to sew many as-drafted, but when I read this post over on the Grainline blog, uhhh, talk about a lightbulb moment!! You’ll notice in her Archer summary, Jen included two over-the-head, Henley-type Archers, a white one and a kind of blue/gray patterned one. Boom! Sign me up, over-the-head, Henley-type Archer!
As far as designing the front placket, I relied primarily on David Coffin’s book Shirtmaking: Developing Skills for Fine Sewing, and here are the measurements of the two plackets I’ll use for my shirt à la the following pre school quality semi-professional-quality sketch:

Neckline Placket
A = 1 1/4″
B = 1 1/2″
x = 2 1/2″
y = 15 1/2″
Sleeve Placket
A = 3/8″
B = 1″   /
x = 2″
y = 6″

All of the pieces are cut and ready to go. This week will be reserved for assembling the muslin. Fingers crossed! 


Loot

After spending these last few months in Europe, I am finally back home in the States and (!!!) reunited with my sewing space. I so-omg-totally cannot. wait. to dust off my sewing machines and let the fabric creations flooowwwww.

Speaking of, while I was abroad, I picked up some absolutely gorgeous pieces that I am beyond excited to work with.

Now just comes the challenge of making my 2014 sewing goals and choosing the patterns/techniques I want to focus on this year! More on that later, but fabric details below.

The cottons

Europe_Fabric-1.jpg

The yellow gingham and the madras print I picked up from Marché Saint-Pierre. The other two were Italian finds.

The wools

Europe_Fabric-7.jpg

All of these guys are also from the Marché Saint-Pierre, and I have them labeled as wool, and they were in the wool section, but I’m definitely going to have to burn test the last two just to be completely sure / unrelated, the light blue fabric has the most wonderful drape ever! I have to come up with a nice flowy skirt type maybe top pattern thing for this one.

The silks

Europe_Fabric-11.jpg

Last but not least, these two gorgeous. pieces of Chinese silks were gifted to me while I was in Italy (I know, I know… geography is all over the place!!) BUT! they are wonderfully scrumptious, and I think I already have the perfect pattern in mind…So much to sew, so little time… Alas, a day in the life!

My ultimate sewing inspiration

My favorite part about living in Paris is… well, truth be told, I don’t have a single favorite, but one thing I especially love is being only a short métro ride away from heaven – street address 31, Rue Cambon.

I have always kind of liked fashion. But at the same time, I’m a scientist so this wasn’t a world I was supposed to be playing in.  Now enter my formal introduction to Mademoiselle Coco Chanel. Game-changing.

I could recount her long list of “iconic”, but the most lasting impression from the book, for me, is that of the unapologetic sense of rebellion (and genius. obvi.) at the heart of her creative process. The options were insufficient, so she made new ones. Boom. There can be more choices!

People sew all kinds of different things for all kinds of different reasons, but à propos de moi, personally constructing my wardrobe means not being confined to anyone else’s ill-fitting vision. Mode. Made. My way. And that is both incredibly fun, and amazingly rewarding.

So, for me, Coco Chanel is a timeless inspiration. When the available options just simply won’t do, time to go off-script. That’s why I sew. Needle and thread for the eternal win.